I found this over at SplitCoastStampers. I love this idea and George the creator really took some time working out this program.
The main idea of the ColorLab is to help navigate the endless combinations and permutations of colors...
New Color Lab for Copics
When you think about it: (Selecting 5 colors & excluding blending techniques)
SU 45 Current colors have 1.2 million combinations, and around 150 million permutations...
CTMH 60 Current colors have 5.4 million combinations, and 655 million permutations...
Copic 334 colors have 33.6 Billion combinations, and around 334 Billion permissions...
Seeing those numbers its easy to understand why the "Surprise Me" feature is the most popular and used feature...
Also, now you can right click any of the 5 'selected swatches' (at the top) and lock them in place (preventing the 'Surprise Me' feature from overriding them... ) This helps when you have one or two colors and are looking for inspiration...
I know the Copic ColorLab does really do justice for the endless possibilities with Copic Markers... We are always looking for more ideas / features / etc.. to add... If you have an idea for a utility - drop me a line!
__________________
-=- George
http://copic.mycreateink.com/

Photo Scraps Store Blog

Wednesday, December 29, 2010
Tuesday, December 28, 2010
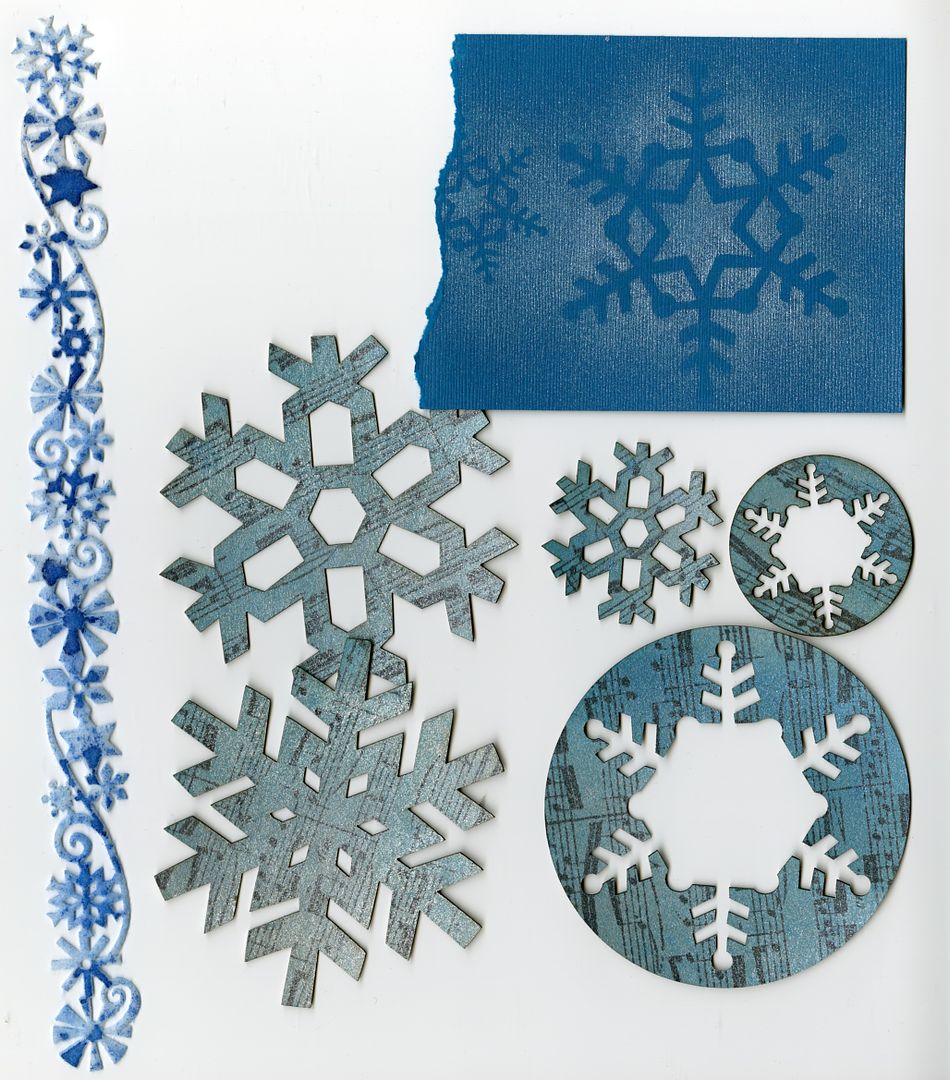
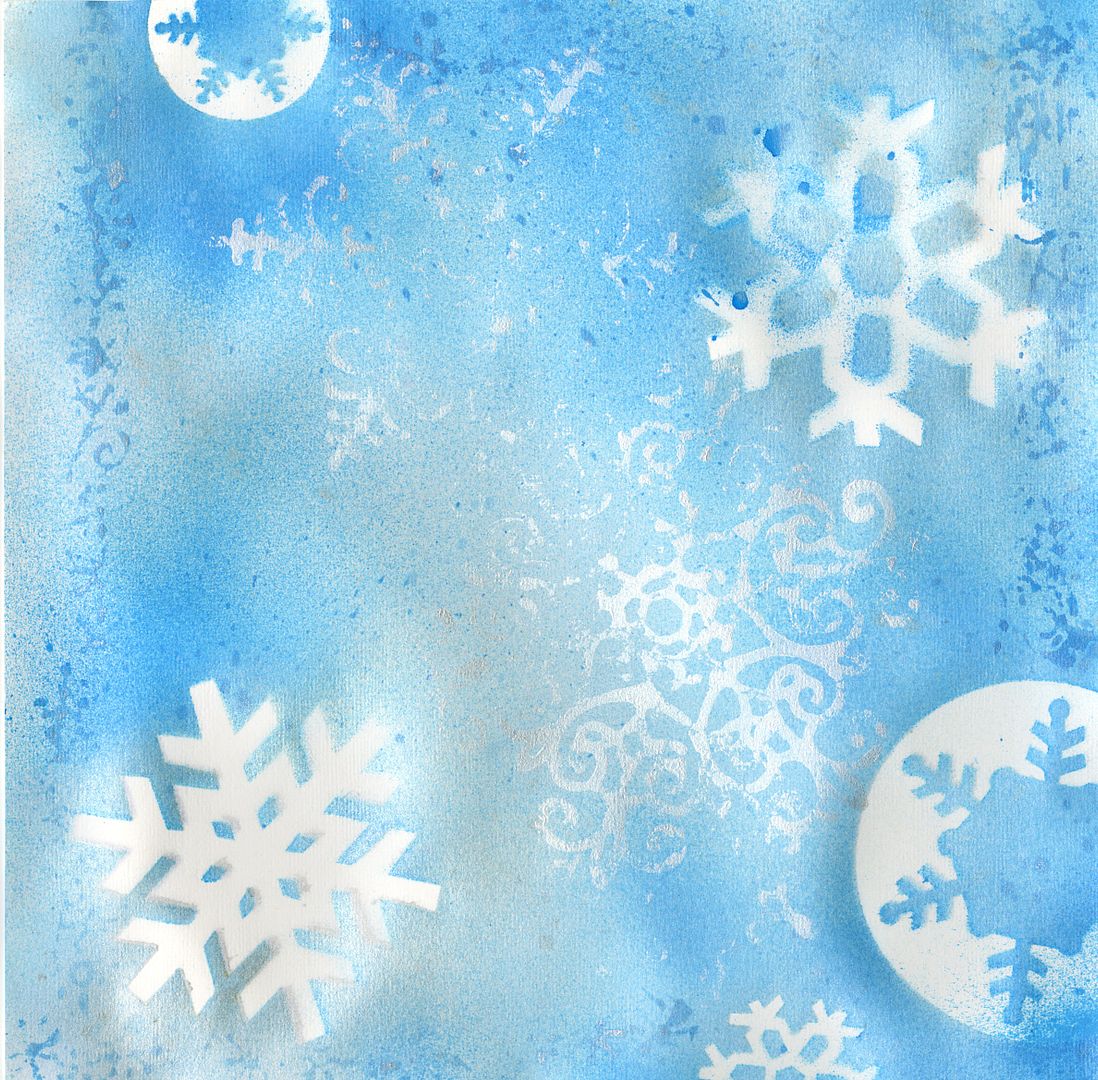
Snowy Cards class samples


Hi everyone! I hope each and every one of you had a great Christmas. Even though I was sick, I had a wonderful day and none of us ever got out of our pjs :) I was sick for a little over 2 weeks and really missed creating during that time. My energy and mojo have returned and I am happy to say that I will be teaching on Sunday January 9th from 1-3 pm.
In this class we will be making 8 cards total, 2 cards of each of the 4 designs shown here. These cards are great for sending as "thank you's" for gifts received over the holidays, winter birthdays, anyone you may have missed on your Christmas list and Happy New Year cards, or whatever your heart desires. As always, I will have a variety of sentiments on hand in case you want to change the sentiment to suit your needs. Be prepared to do some heat embossing, some cutting, and a tiny bit of coloring. We will be using a variety of stamps including some of the new sentiments from Hero Arts.
Here is a list of items you should bring to class in case you want to use your own and not have to share class supplies:
Glossy Accents (aka Diamond Glaze, Crystal Effects)
Sharp scissors
Copic markers: E33 and W1Sharp scissors
Silver ink for edging
Keep watching here on the blog for other upcoming classes, and don't forget Demo Day on January 15th.
I look forward to seeing you all in the New Year!
Cindy
Sunday, December 26, 2010
Layout Inspiration from Sandy Boyd

Sandy has been busy catching up on all her Christmas Scrapbooks. In this layout, she used the ANW Creswood Christmas line. She created her own scalloped die cut paper by tracing the outline from another piece of paper. One of the papers was a house paper and she cut out the houses individually to use them as an embellishment. She created faux ribbons from other matching papers.

This layout features the Jovial Basic Grey line. I love how she cut out the paper on the upper right corner. She added some ornaments from another paper in the line and some stickers for a good balance of elements on the top of the pages.

This is another layout using the Jovial line. The great thing about these Basic Grey lines is that the paper are all double sided and you can get a completely different looking layout just by using some of the other papers. I love how she punched out different sized circles out of the different patterned papers to create a line in the center of the pages.
Saturday, December 18, 2010
More with KI
Hi From Lisa C
I was sneaky on this page as I flipped over the pocket page I had made previously from KI Memories to use as my base. (Saves a little money as well as space in my scrapbook album.) I used the Lagoon Calendar page (could you just die over the fabulous stitching around that bracket?!) by cutting just the lower portion of the page to use as a midline accent in my layout. It really draws the eye in towards my photos plus I still have most of that calendar page remaining for another layout. Again I mixed colors from KI's printed cardstock and the Hot Strips Borders to create photo mats and accents. For the picture in the lower righthand corner, I trimmed the Hot Strips Borders to frame the pix. The glittery title word "smile" also came from KI - Happy Words Sticklers, which we can barely keep in stock! The chipboard heart and bracket were originally white from Pebbles Chips that I ran an inkpad over to change the color. The Pebbles Chips have an amazing variety and selection in each package to complement any project. Take time for yourself during this busy holiday season by playing with all that KI Memories has to offer!

I was sneaky on this page as I flipped over the pocket page I had made previously from KI Memories to use as my base. (Saves a little money as well as space in my scrapbook album.) I used the Lagoon Calendar page (could you just die over the fabulous stitching around that bracket?!) by cutting just the lower portion of the page to use as a midline accent in my layout. It really draws the eye in towards my photos plus I still have most of that calendar page remaining for another layout. Again I mixed colors from KI's printed cardstock and the Hot Strips Borders to create photo mats and accents. For the picture in the lower righthand corner, I trimmed the Hot Strips Borders to frame the pix. The glittery title word "smile" also came from KI - Happy Words Sticklers, which we can barely keep in stock! The chipboard heart and bracket were originally white from Pebbles Chips that I ran an inkpad over to change the color. The Pebbles Chips have an amazing variety and selection in each package to complement any project. Take time for yourself during this busy holiday season by playing with all that KI Memories has to offer!

Friday, December 17, 2010
KI Memories
Who doesn't love calendar pages, stitched papers, and the sweet colors found over the rainbow? Well, KI Memories combined it all and created fabulous pocket pages to boot!!! I was so excited to play with the goodies that I did not one, not two, but three fast and easy pages.
For the first page for my daughters' first day of school I used the Candy Calendar but turned it sideways so the days of the week were running vertically in the left margin. (I just had to be different!) Hot Strips borders with their beautiful colors and fun designs was the next item added to my layout along with KI's Hip Chip alphies. If you haven't played with Hampton Art's Ditto Layered Felt Buttons, you need to get moving! These adorable buttons are the perfect addition to any project.

For my second page, I created a simple, yet eye-catching place to stash memorabilia from my daughter's sophomore year of school. I am always looking for ways to store class schedules, certificates, and report cards. KI's 12x12 Pocket Page did most of the work for me. I sealed the sides of the pocket to contain the items and will make a simple slit in my page protector to access the items. To show off the bracket shape of the pocket I ran around the edges with a little ink then backed the inside of the pocket with a peice of printed cardstock from KI's Over the Rainbow collection. Again I finished the page with Hot Strips borders, Hip Chip alphies and more Ditto Layered Felt Buttons. The possibilities are endless in this collection!
Thursday, December 16, 2010
Photo Scraps is Closed Today
Hi Everyone,
Due to the quick accumulation of snow on the roads, Photo Scraps will be closed today, Thursday December 16, 2010. We will be open again tomorrow at 10 AM.
Today's Daily Special will be extended to tomorrow.
Due to the quick accumulation of snow on the roads, Photo Scraps will be closed today, Thursday December 16, 2010. We will be open again tomorrow at 10 AM.
Today's Daily Special will be extended to tomorrow.
Wednesday, December 15, 2010
Holiday Hello's from Gina A.!
I really love this KI line and have used the calendar pages already on several layouts. So when we were given a chance to create with these products, I was really excited. I used the "Leafy" green pages for my background with a torn "Poppy Calendar" as an embellishment and place to journal. The KI Hip-chip letters were placed on cardstock squares for my title. I especially love the self-adhesive keepsake pockets - I attached each to a piece of red cardstock to make them "pop" and added journaling cards with green ribbon where I can write about the specific "to-do's" that make my holidays (and yours???) crazy-fun!
And speaking of journaling cards, I know we are all SOOOO busy this time of year but I'm hoping that you will take time to jot some quick notes during the season so that you have some memory joggers available when you are ready to crop your holiday pics this January. Remember: your page or album isn't really complete without journaling! (If you need some help in this area, make it a New Year's Resolution to join me for a journaling class in 2011! Look for "Write On!" or "Write More!(All About ME)" on our store calendar)
I've made it a "Photoscraps Tradition" to come out to the New Year's Day Crop the last few years. We always have a blast and it' a great chance to get those holiday photos scrapped right away. Hope all of you enjoy a safe and happy holiday season and I look forward to cropping with you on New Year's Day and seeing you in the store - and in class! - in 2011!
Gina A.

Two cards today


I love having a little quiet time to sit at my desk and play. I got the chance this morning to make 2 cards using our fabulous DT paper from KI this month, plus I opened up one of my new Hero Arts sets. I love having new toys! Have you seen the new Hero Arts catalog? It is chock full of great new stuff, a lot of which you will be seeing me use in some upcoming classes.
For my cards today, I again CASEd myself by using layouts I've used before. I know I say it all the time, but a change of paper and a stamp can make a previous layout look brand new. So look closely at these cards and see if you can recognize the layouts I've used.
My first card uses the flip side of KI's Over The Rainbow paper "Snow" that I used on the first DT card I posted last week. I paired it with a stamp by My Sentiments Exactly, my favorite EK Success border punch, some silver paper, ribbon, and some silver bling by Hero Arts, plus Cropadile's stub corner punch.
My second card uses both the front and back side of KI's Over The Rainbow paper "Powder", the Tim Holtz baroque die, a butterfly punch and some pearls from Kaiser, plus a new Hero Arts sentiment stamp. Don't you just love those mixed fonts? I sure do!
My second card uses both the front and back side of KI's Over The Rainbow paper "Powder", the Tim Holtz baroque die, a butterfly punch and some pearls from Kaiser, plus a new Hero Arts sentiment stamp. Don't you just love those mixed fonts? I sure do!
Cindy
Tuesday, December 14, 2010
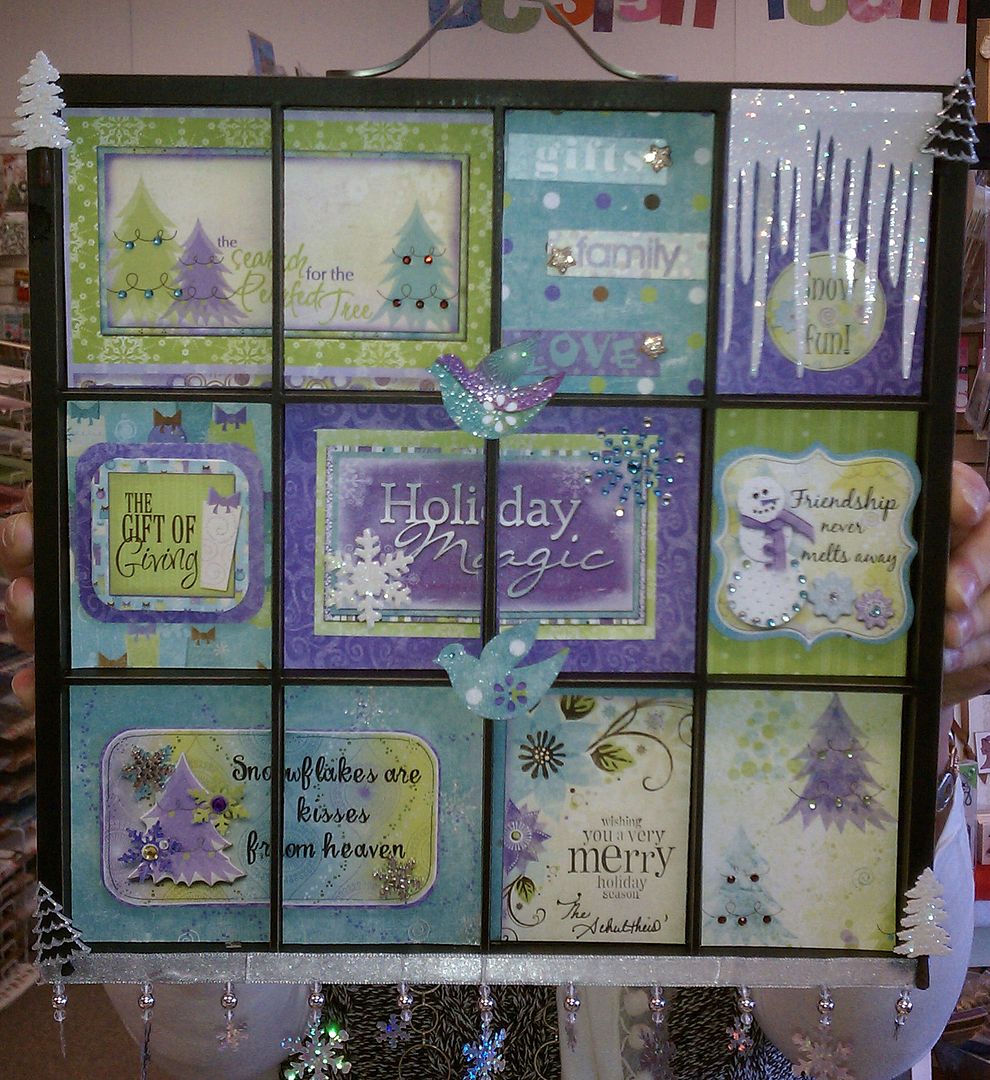
New Talent Show Entry from Sue S.
One of our wonderful customers showed us this Painters tray she decorated as a present. Sue S. used the wonderful Bo Bunny Winter Joy. She kicked up the icy tone of the paper by adding glittery paper snowflakes and hand cut icicles. Another fun detail is the fun ribbon she added to the bottom of the tray with dangling beads and snowflakes.

Saturday, December 11, 2010
CASEing myself

Does everyone know what CASE means? For those that may not, it means "Copy And Steal Everything" or to put it nicely, "Copy And Share Everything". It is also known as scraplifting or stamplifting. So, for my first card I CASEd myself by using the same layout I am using on today's snowflake Demo Day card. As you all know, I love the layouts that I can use over and over for all sorts of occassions and never make the same card twice.
For this card, I used a Hero Arts saying, a little bling and some black ribbon (which didn't scan well), a Spellbinders die, and a great paper from KI's "Over The Rainbow" line called Snow. The paper reminds me of sequin waste or honeycomb, and I think it would look fabulous on a wedding card or an anniversary card, so don't be surprised if one of those pops up later this month. I kept my card to black and white because I think that color combo is so very elegant.
I hope to see you all at Demo Day today!
Cindy
Wednesday, December 8, 2010
Shabby Chic December Design Team
Hi,
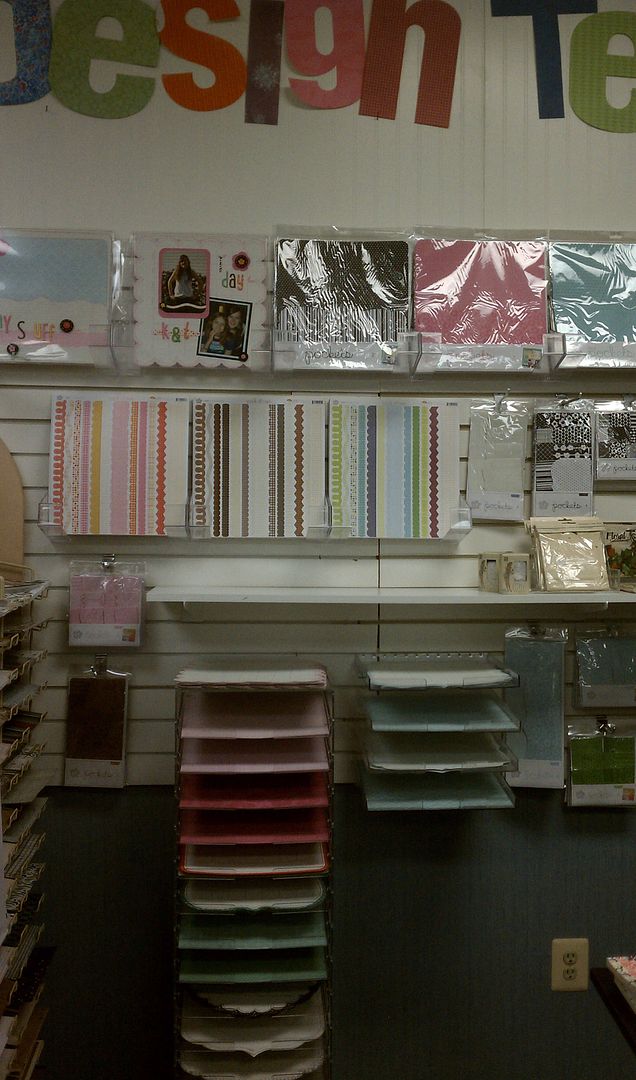
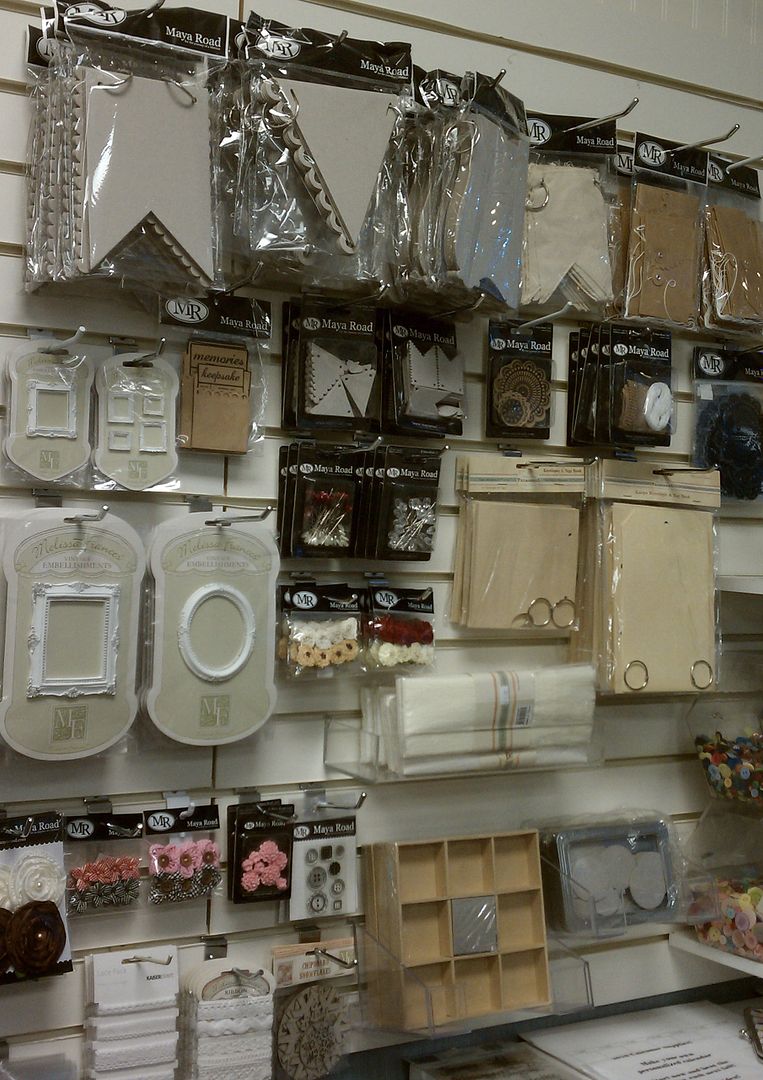
Lisa Hetrick here...LOVE. LOVE. LOVING the NEW PRODUCTS from Maya Road and Melissa Frances that are being featured this month in the store. Lot's of super shabby chic fun stuff to work with. And.... lots of KRAFT products to create with. You all KNOW I love my KRAFT.
This month's products inspired me to create a collage CANVAS project. Here's a pic of the whole canvas. Keeps scrolling. I took pics of all the details.

Look at all the lovely details.
The small white vintage Melissa Frances frames created a perfect home for the ATC (ART C) red beads. The KRAFT Keepsake pocket is NEW from Maya Road. The vintage inspired heart pins are NEW from Maya Road as well. Gorgeous and fun to work with. The vintage lace is from Hero Arts and the LOVE and STORY ticket embellishments are from the one and only Tim Holtz.

I sprayed the NEW Maya Road chipboard pennants with Glimmer Mist and wired them up with silver (ATC-ART C) wire and beads. PERFECTION. The Maya Road chipboard hearts come in the package of mini pennants and are all blinged out with glitter and silver paint finished off with glossy accents. Look at that super cute resin pink rose. They're NEW from Maya Road.
 Have you seen the new Melissa Frances Crepe paper and Mica Flakes? Just gorgeous to work with. I die cut the flower shapes with the Tim Holtz Tattered Flowers die and finished it off with a red rosette from Maya Road. The mica flakes give your project a sparkly, vintage touch, easy to apply and adhere with glossy accents. There are those super cute pink resin roses again!
 Did you know you can emboss with the Ranger Paint Daubers? I took the silver paint dauber, covered the outer edges of the canvas, poured on UTEE embossing powder and heat set. The perfect finish to the outer edge of the canvas and super shiny.

The base of the canvas with the photo was printed from my color printer on a piece of white copy paper. I kind of tweaked it a bit in Photoshop, printed it out and adhered it to the canvas using gel matte medium (mod podge works too), covering both sides and sealing the paper to the canvas. All of the embellishments were layered on top. How fun is this? Didn't take long and definitely a keepsake. The picture was kind of blurry when I took it, but who cares, it looks amazing on this canvas. A vintagey chic hybrid project that you definitely get your hands messy with.
Enjoy
Lisa Hetrick here...LOVE. LOVE. LOVING the NEW PRODUCTS from Maya Road and Melissa Frances that are being featured this month in the store. Lot's of super shabby chic fun stuff to work with. And.... lots of KRAFT products to create with. You all KNOW I love my KRAFT.
This month's products inspired me to create a collage CANVAS project. Here's a pic of the whole canvas. Keeps scrolling. I took pics of all the details.

Look at all the lovely details.
The small white vintage Melissa Frances frames created a perfect home for the ATC (ART C) red beads. The KRAFT Keepsake pocket is NEW from Maya Road. The vintage inspired heart pins are NEW from Maya Road as well. Gorgeous and fun to work with. The vintage lace is from Hero Arts and the LOVE and STORY ticket embellishments are from the one and only Tim Holtz.

I sprayed the NEW Maya Road chipboard pennants with Glimmer Mist and wired them up with silver (ATC-ART C) wire and beads. PERFECTION. The Maya Road chipboard hearts come in the package of mini pennants and are all blinged out with glitter and silver paint finished off with glossy accents. Look at that super cute resin pink rose. They're NEW from Maya Road.
 Have you seen the new Melissa Frances Crepe paper and Mica Flakes? Just gorgeous to work with. I die cut the flower shapes with the Tim Holtz Tattered Flowers die and finished it off with a red rosette from Maya Road. The mica flakes give your project a sparkly, vintage touch, easy to apply and adhere with glossy accents. There are those super cute pink resin roses again!
 Did you know you can emboss with the Ranger Paint Daubers? I took the silver paint dauber, covered the outer edges of the canvas, poured on UTEE embossing powder and heat set. The perfect finish to the outer edge of the canvas and super shiny.
The base of the canvas with the photo was printed from my color printer on a piece of white copy paper. I kind of tweaked it a bit in Photoshop, printed it out and adhered it to the canvas using gel matte medium (mod podge works too), covering both sides and sealing the paper to the canvas. All of the embellishments were layered on top. How fun is this? Didn't take long and definitely a keepsake. The picture was kind of blurry when I took it, but who cares, it looks amazing on this canvas. A vintagey chic hybrid project that you definitely get your hands messy with.
Enjoy
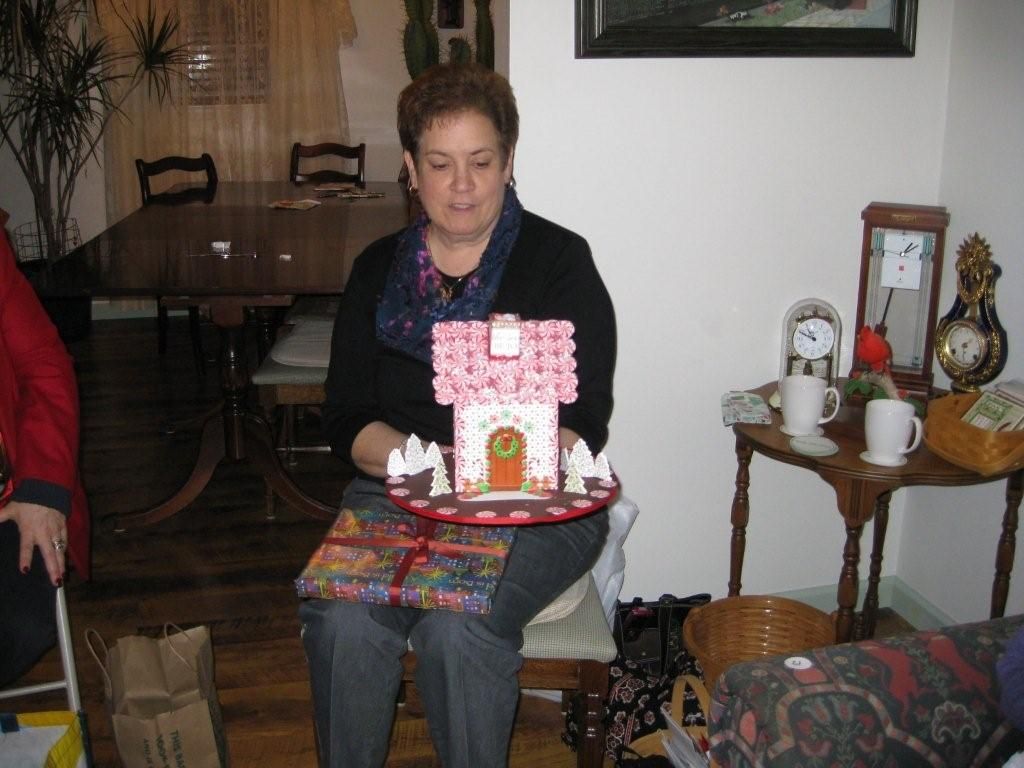
Talent Show Entry from Carol Hartline
Hello,
Today I have a great Holiday entry to our Talent Show from Carol Hartline, She bought this Maya Road house and decorated it like a real gingerbread house. Candy patterned papers made the decorating so much easier. Peppermint paper for the rooftop, She cut out individual peppermints to line the edges of her house. Chipboard trees and wreath finish it off. Very Festive and so much easier (for me) than a real gingerbread house.
Today I have a great Holiday entry to our Talent Show from Carol Hartline, She bought this Maya Road house and decorated it like a real gingerbread house. Candy patterned papers made the decorating so much easier. Peppermint paper for the rooftop, She cut out individual peppermints to line the edges of her house. Chipboard trees and wreath finish it off. Very Festive and so much easier (for me) than a real gingerbread house.

Monday, December 6, 2010
Design Team for December
I've been busy this morning playing with my supplies to make a layout for our design team wall. I used some new products on pages showing one of last years snow storms. See if you can find these items: sour apple chalk ink, smootch spritz in vanilla shimmer, pearl metalic paint from Adirondack, glimmer screens by tatered angels, and chip snowflakes by Melissa Francis. I also used papers from My Minds Eye and Little Yellow Bicycle with some matching bazzil cardstock and maya roads ribbon to make a layout that I would not normally do. I am not a stamper so I'm not used to having blue fingers! It was fun playing with different mediums even though I don't like getting dirty! But new products have a way of tempting us to get out of our comfort zone, so try something new today, just for fun! Check out my other "creations" from this mornings play time, enjoy! Gina P. I forgot to add one detail of info. The tattered angels mist color I used on my snow flakes was Jack Frost!


Sunday, December 5, 2010
My Demo Day cards


Woo hoo! Demo Day is just around the corner. This is always such a fun event for the store and I look forward to doing it every month.
This month I will have 2 cards I've designed for you to create, one that is very simple and one that requires you to do some stamping of some lovely Hero Arts snowflakes. For the simple Christmas card I went with an elegant look of gold and black and the stunning music background paper by the Girl's Paperie. For my snowflake card I took a cue from Bo Bunny and used non-traditional winter colors of purple and aqua. The snowflake card will have a slightly different background on Demo Day as the paper I used at home is no longer available, but it will still be beautiful.
Make sure to come join us this Saturday (12/11/10) from 11 - 4 pm!
Cindy
Thursday, December 2, 2010
Supply list for Saturday's class
Here are the supplies for class this coming Saturday's Christmas Cards class in case you want to bring your own so that you do not have to share:
Peeled Paint Distress ink and sponge dauber
Antique Linen Distress ink and sponge dauber
Cottage Ivy Memento ink
Gold ink (any brand ok, my preference is Encore)
Rich Cocoa Memento ink
Hero Arts stamp sets: CL 469, CL465, CL463
I have 1 spot left in this Saturday's class. Come join us!
Cindy
Peeled Paint Distress ink and sponge dauber
Antique Linen Distress ink and sponge dauber
Cottage Ivy Memento ink
Gold ink (any brand ok, my preference is Encore)
Rich Cocoa Memento ink
Hero Arts stamp sets: CL 469, CL465, CL463
I have 1 spot left in this Saturday's class. Come join us!
Cindy
Wednesday, December 1, 2010
Is it really December?
Wow, where does the time go? I cannot believe December is here already and another year is just about over. With a new month comes a new batch of Design Team products and that is always something to look forward to.
This month we will be featuring the Kitschy Kitchen line by Melissa Frances as well as goodies from Maya Road and KI Memories calendar pages. What a lot of fun stuff! Keep watching here on the blog and in the store for our Design Team creations.
And don't forget that Demo Day is Saturday 12/11 from 11 - 4 pm.
I'm looking forward to seeing you then!
Cindy
New Talent Show Card from Laura
Hi Everyone,
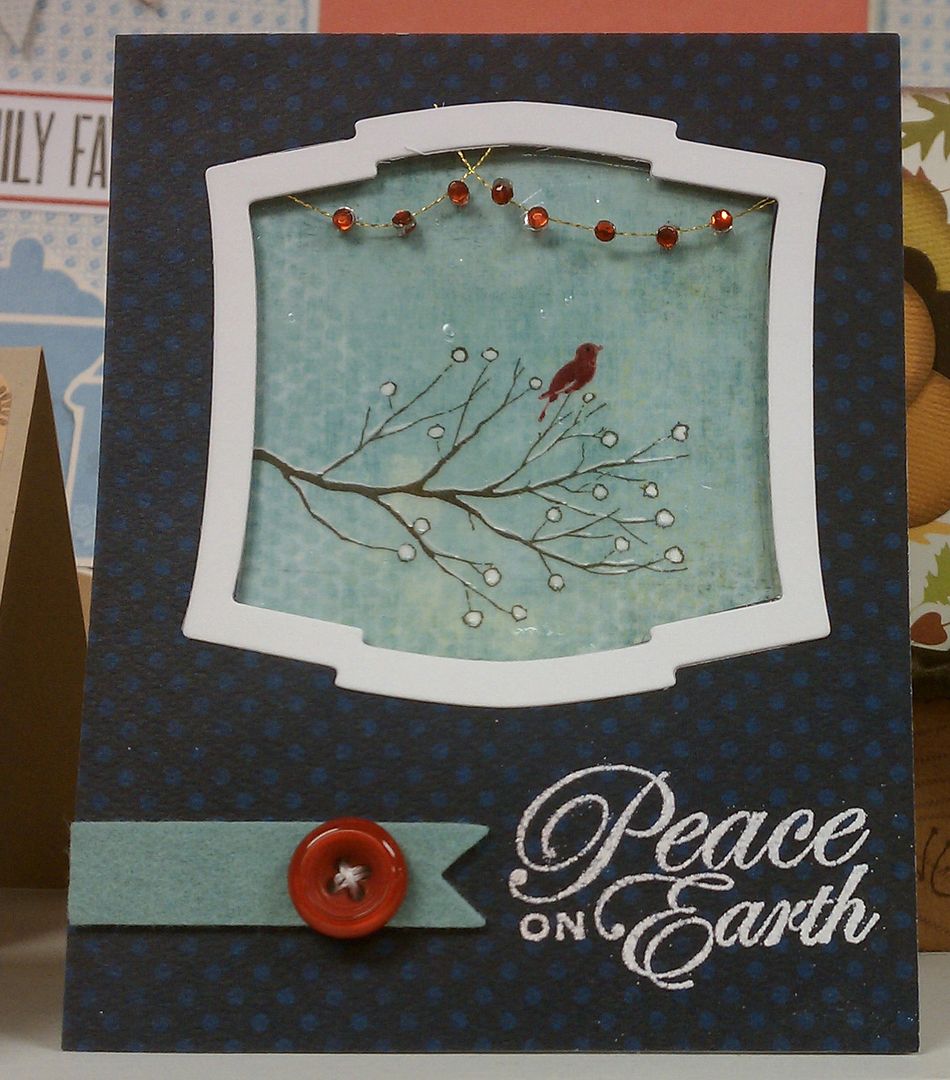
Laura has been creating more fabulous Christmas cards. For this card, Larua made a window on the front of her card using the Labels two set of Spellbinder Dies. She used two of the dies nested together to create the white window. She stamped her images on the background paper and to make it pop, she painted Glossy Accents over the entire background. To make the rhinestone garland, she put two rhinestones back to back with gold thread in the center. The Sentiment was done with white embossing powder to make it really stand out.
Laura has been creating more fabulous Christmas cards. For this card, Larua made a window on the front of her card using the Labels two set of Spellbinder Dies. She used two of the dies nested together to create the white window. She stamped her images on the background paper and to make it pop, she painted Glossy Accents over the entire background. To make the rhinestone garland, she put two rhinestones back to back with gold thread in the center. The Sentiment was done with white embossing powder to make it really stand out.

Subscribe to:
Posts (Atom)