Friday, April 29, 2011

NEW CLASS...Wedding and Anniversary Cards


While William & Kate were busy tying the knot today, I was busy designing my next class. Join me Saturday May 28th from 12 - 3 pm for my newest class, Wedding and Anniversary Cards. We will be making 6 elegant cards perfect for giving to the newly married couple or the couple that has been married forever. Fee $24

I look forward to seeing you soon!

Cindy

Thursday, April 28, 2011

It's all about the GLUBER

What say you?

CHECK OUT this project:


I used all new Prima Flowers, and the NEW GLUBERS
to create the fabric rosette in the middle.

What's a GLUBER you ask? Go check it out in the store.
It is a big honkin' GLUE DOT.
Perfect for making fabric and/or paper flowers in a snap.
Super fun watering can project made easy with PRIMAS and GLUBERS.

Perfect day to create something Springy, wouldn't you say...
-Hetrick

Wednesday, April 27, 2011

6 x 6 Mini Chip Board Album - design team

Woohoo, I am on a roll now! Second blog posting ever!! I have to say I had sooooo much fun making this mini album. I really had a hard time choosing the card stock, I wanted to use it all! I ended up using Hometown Summer - Heat Wave, Green Acres and Summer Fun and Cosmo Cricket Coral Bloom. For embellishments I used Lovely Bits Butterflies and Doilies, my Cricuit Machine (for the words, baskets, tag mats and the interactive tag that can hold lots more pictures) lots of paper flowers and, the flower border punch, its a Martha... I just loved the bright bold colors. I am always looking to be able to put the most pictures in a small space... At least one pocket is a must for me in a mini album and I did manage one early in the album. I filled the pocket with tags cut large enough for pictures and room to journal on the back. Loved the green paper and thought it a perfect backdrop for flowers, lots of them! I cut out the baskets on the Cricuit machine, a little ink and gel pen and they were ready to be filled with flowers embellished with pearl bling! Family fun which was the theme for this album. I cut out tags, scored them at the top so they would bend and made a little album with in the album! Quite a feat when you are only starting with a 6x6 to begin with. If you had a chance to view this in the store, you got to see the silly side of the Dinsmore's as we barely survived our encounter with the plastic alligator ... Lots of smiles on the next page and I went whimsical with the letter placement. Straight lines don't work well for me... I love to cut out patterns from card stock to use for embellishments, and the watermelons punch perfectly! To keep the watermelons from getting crushed - I also punched a piece of chip board (or was it a cereal box?) and then attached the punched out watermelon to it. I did the same thing for the front cover.

I saw lots of people taking pictures, of the album. If you recreate this album it I would love to see it. I am always in awe when someone takes my basic design and makes it their own. Keep creating! Tina
Photobucket
Photobucket
Photobucket
Photobucket
Photobucket

Tuesday, April 26, 2011

Design Team Mini Baskets- Tina

Wow! This is my first blog posting - seriously... I know the month is almost over and we'll be designing something new in a week, but I really did need to learn how to do this...

I know most of you have seen the little mini-baskets that I could not resist making. Traditionally baskets = Easter this time of year, but I wanted you to think out side of the box (or in this case basket :D) so I added the friendship one. Think of the smile you will receive as you hand someone one of these sweet little baskets. I have to give kudos to Jill who told me she saw little baskets like these and described them so well - it was almost a tutorial - and here they are! I used Hometown - Summer and Fruit Stand - Green Acres card stock for the basket bases, ribbon for the handles and a scallop circle punch for the doilie effect on the outside of the basket. The fence boarder is a Fiskars punch - LOVE IT!!!! The treats inside were stamped using Stampendous Friendship Assortment, Impression Obsession Just Because and Happy Easter and of course, colored in with lots of copic markers. Have to go. Next blog will be on the mini album!
Photobucket

Friday, April 22, 2011

"SCRAPBOOKING" banner

Hopefully you have noticed the new Scrapbooking display we put up at the store--if not, it is on the wall by the scrapbook bookshelf display in the back of the store. Each month, one of the scrappin' gals at Photo Scraps will display their layouts with some motivational prompts to entice and educate you on the fabulous art of scrapbooking! We have such a passion for this pasttime and we want to share it more with you. Anyhoo, those layouts needed a "title" and what better idea than to make a huge "SCRAPBOOKING" banner to define that area! I started with 2 banner chipboard books from Fancy Pants and used 12 of those as my bases. Then, armed with tons of scraps and the handy-dandy pink glue gun from Reminisce, I put this together over the very rainy (but perfect for scrapbooking) Saturday afternoon. Lots of layers of papers, border punches, flowers--lots of different styles, ribbon, bling, Stickles and big chip letters I painted turquoise made this a great project. I love how bright and happy the colors are and I think it will be eye-catching on that wall. Come to the store soon and check it out....let me know if you have any questions about any part of this creation. Try a banner project yourself. You could spell out your child's name, or spell out "Happy Spring", or make a "Welcome" banner for your home. The possibilities are endless. See you soon!! Lisa H., aka: Tall Lisa
Photobucket
Photobucket
Photobucket

Tuesday, April 19, 2011

Another Design Team card


Here is a quickie card using our fabulous Cosmo Cricket and Pink Paislee papers for April's Design Team. I used the yummy looking watermelon paper (front and back) to get the different patterns on my card. I paired that up with a Hero Arts stamp, a little ribbon, and just once piece of bling, and I got a quick and cute card to use for just about anything.

Have you seen the Design Team wall in person? There are so many terrific projects to look at...albums, pages, cards, altered items. Make sure to check it out when you are in the store!

Cindy

Monday, April 18, 2011

Repeat Flower Soft cards class


For those who were not able to make it in March, I will be teaching my 4 Seasons Flower Soft card class again on Saturday May 7th from 12 - 3 pm. We will be using a fantastic main image from Impression Obsession and each card is designed to evoke the 4 seasons.

Come play with me!

Cindy

Sunday, April 17, 2011

Creating with Cosmo

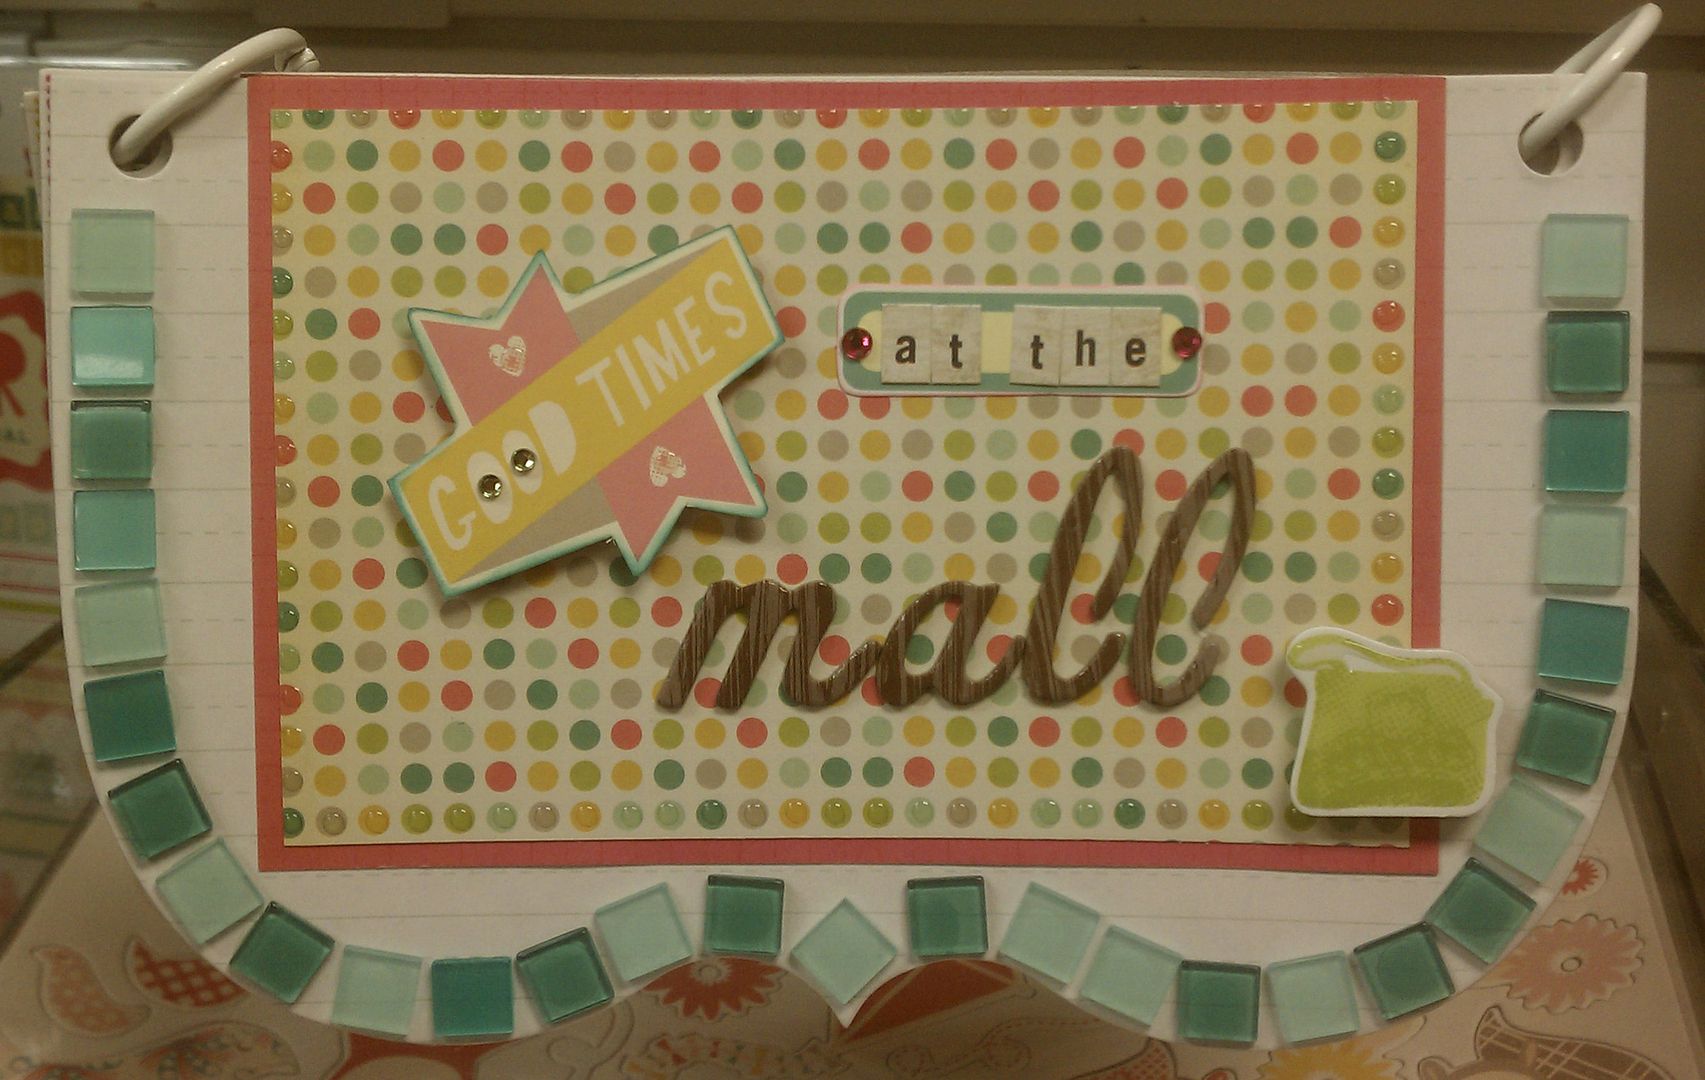
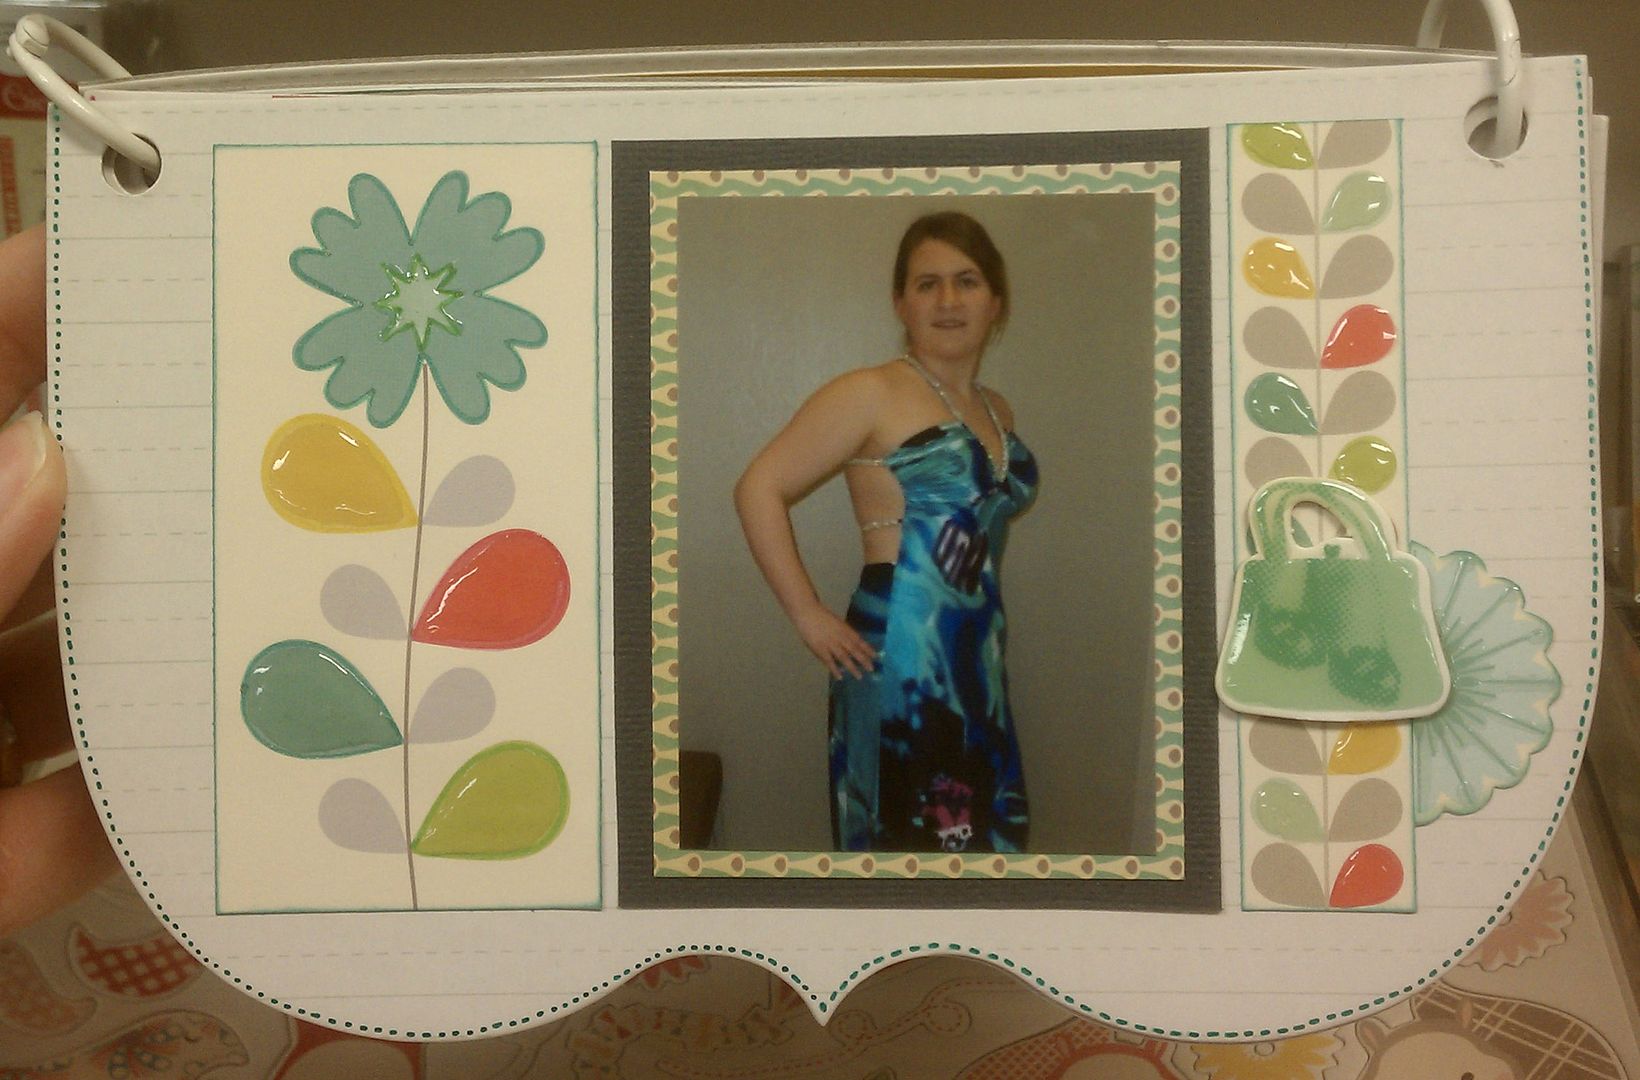
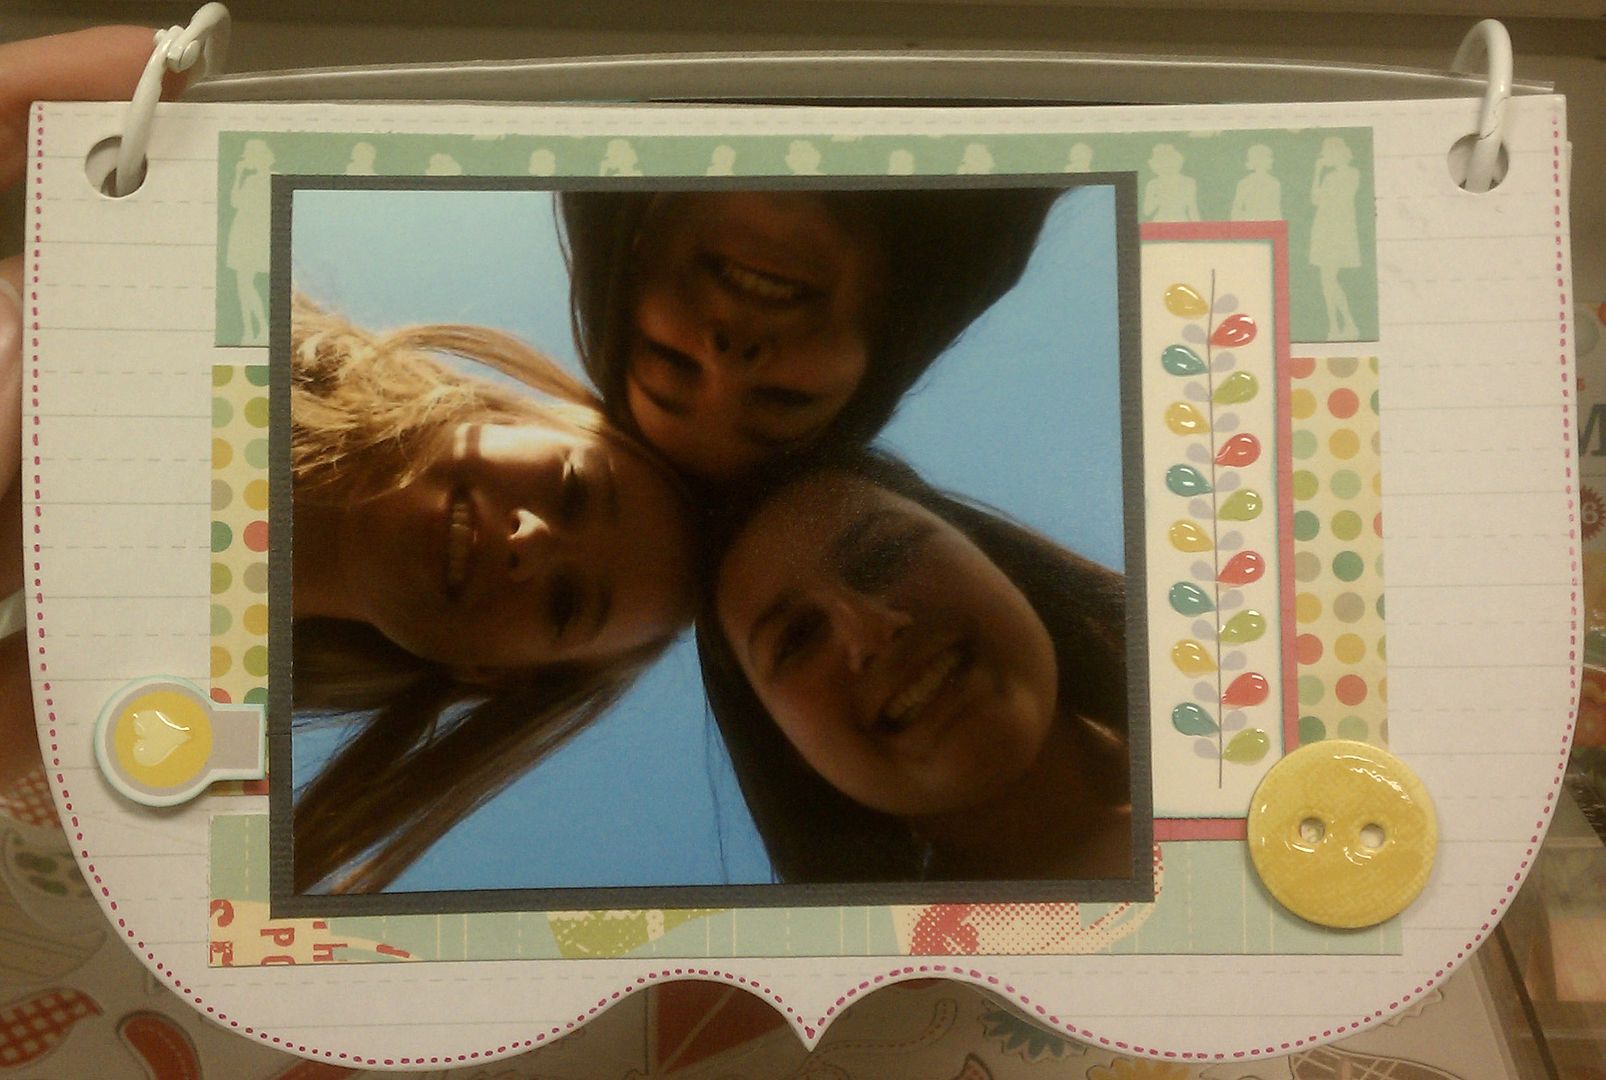
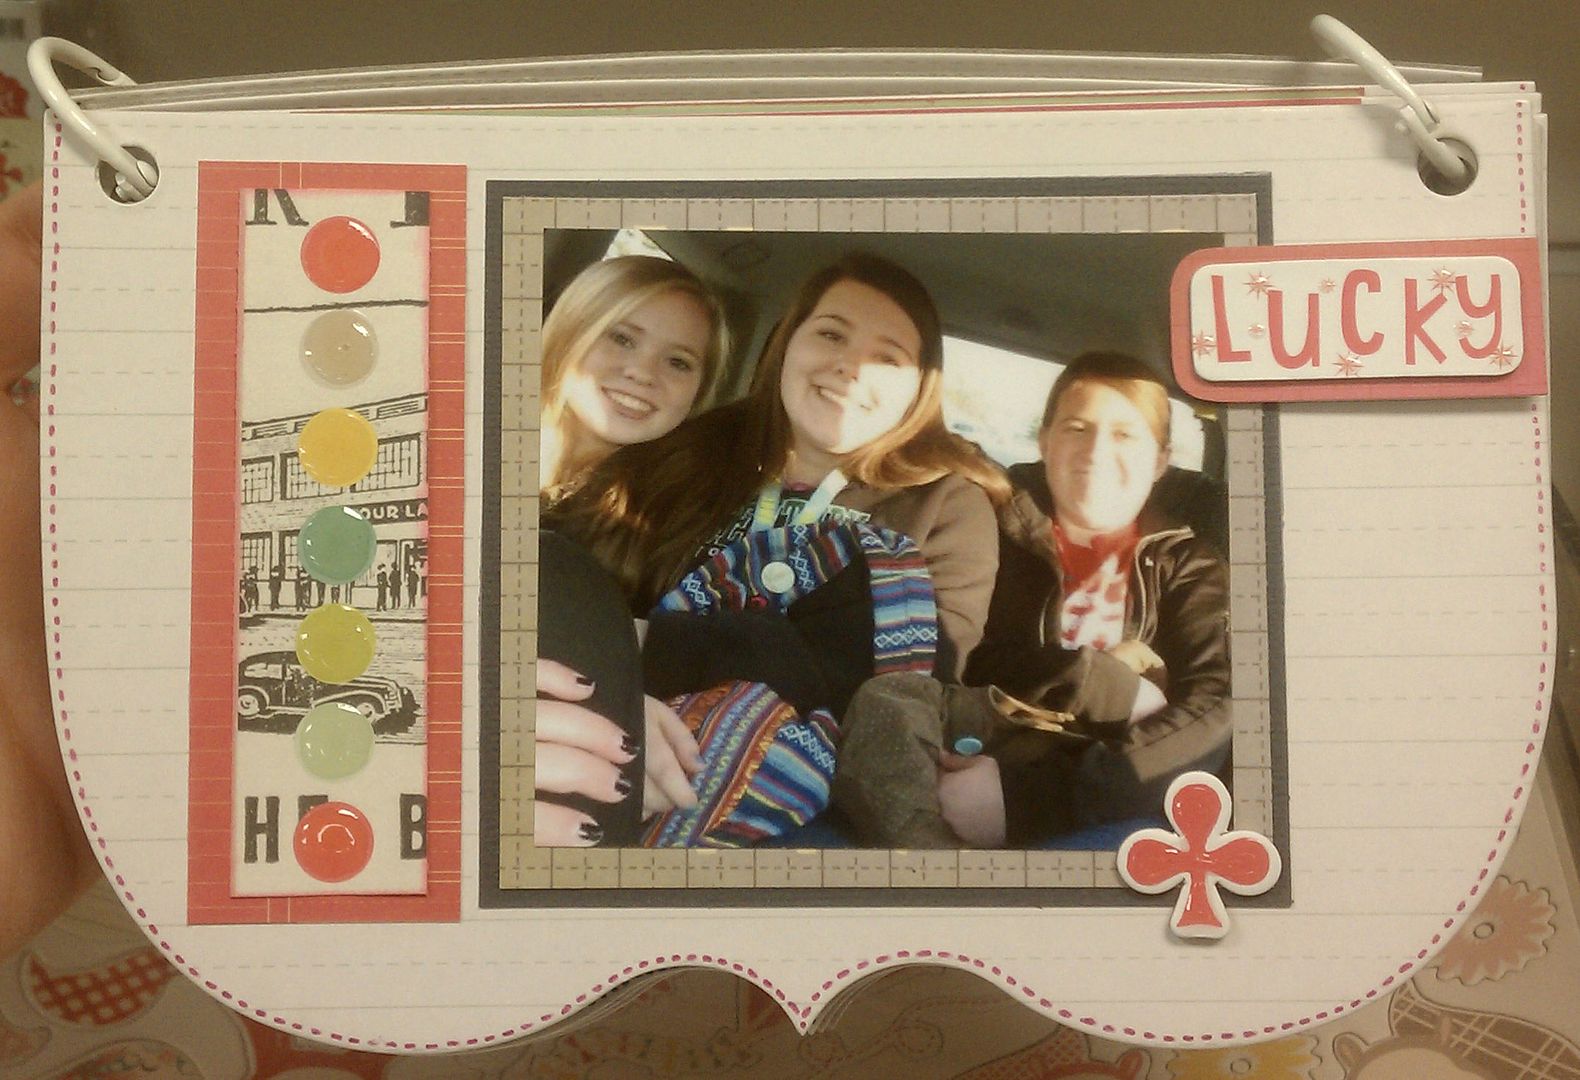
This months DT we chose from the new Cosmo Cricket lines, but I already picked up the line called UPcycle as soon as it hit Photo Scraps the month before. I knew this line would be perfect to show off pictures of my girls shopping with me and my sister! It's got that hip, retro vintage feel, and the colors are vibrant pink, blue, yellow, and green. I played with everything in the line, including the cardstock stickers, chip board stickers, gems, and 6x6 paper pad. I also picked up some of the 12x12 cut up sheets to use as tags to journal on. But I need to mention my inspiration, a 5x8 Banner from Pink Paislee that I made into a mini book! It comes with 10 "pages" and a fun bracket shape that I love. So all these goodies were just waiting for me to play with them, and Design Team gave me the excuse to do so. While my pictures were printing at Photo Scraps, I gathered a couple more goodies I thought I might "need." I got some teal square tiles from Harmonie, something new we had just got in, to decorate around the cover of my book and accent the bracket shape. I also picked up some new spica pens, the other reason I came in was to replace some that were used up, in pink, green, yellow, and turquoise. I drew "stitches" around each page in different colors, also to accent the bracket shape of my book. Armed with my pictures, I sat down with a large bottle of Glossy Accents and got busy with my supplies. Using a little bit of all my products, I was able to whip this up in one morning. The coordinating pad, with the smaller prints of this line, made an easy complement to my pictures. Some things I inked in pink or turquoise chalk ink to make them pop, but the easiest embellishment was using Glossy Accents on everything from words, to stickers, to chipboard and paper - I love this stuff! I let it dry for a couple hours before I took it in to the store to show off my creation. I must credit two people for this projects inspiration, Lisa C. showed me how to print pictures off of facebook while I was shopping at Photo Scraps, and Lisa Hetrick told me the many benefits of a 6x6 paper pad (basically, you get the entire paper line in a smaller print so it takes up less space in your craft room, cost less, but you still get the whole coordinating line!). So thanks ladies for your wisdom, I could not have created without you! And yes Lisa C, I will think of you every time I get pictures from facebook!
Photobucket
Photobucket
Photobucket
Photobucket

Photobucket

Saturday, April 16, 2011

Playing with Cosmo

...and I don't mean Kramer :)
Here's a little project I put together to share some memories and PLAY with new products from Cosmo Cricket, Tim Holtz and ANW Crestwood.

I used the brand new TPC Studio Beyond the Page frames to creates this fun piece of memory decor. These are super fun to play with. Plain white frames, ready for you to get creative with. A BLANK CANVAS. Wowsa!

Using the new Cosmo Cricket UPCYCLE paper line, some Tim Holtz dies, distress inks and crackle paint, I created this super fun wall frame complete with a GOOFY pic of 4 Lisa's and a Tracy from CHA, LA 2011. See it LIVE and in person at PhotoScraps. Hurry, get the paper before it's all gone. I may have gone a little overboard with the perfect pearls, but I just can't help myself.

And... if you don't have this die yet... You gotta have it. It makes creating those cute paper rosettes a cinch!

I rocked that Viking Hat!
Get your Art on! -Lisa Hetrick

Friday, April 15, 2011

"FAMILY" Frame

When these frames from TPC (the Paper Company) arrived at the store, I immediately thought of doing an altered frame for my home. I am tickled pink with how it turned out. These frames come in several different sizes and are white to begin with so they accept paper or inking/paint beautifully. I chose to cover mine with paper from American Crafts and made lots of handmade flowers to add also. All the flower techniques are easy to do, just takes a bit of time and patience. I used a clear stamp set from JilliBean to add to my flower layers. I bit of satin ribbon and a stickpin on the left adds interest and a chipboard banner made from Maya Road chip pieces was added on the top left--I strung it with our new Baker's Twine in green...love it!! The centers of my flowers are the new Hero Arts Hues--I used the pearl, green and blue. The phrase at the botton is a Kaiser Family rub-on...Kaiser's rub-ons are so easy to work with!!I handcut leaves out of the green scraps, scrunched them a bit (after misting them with water to make them easier to bend) then inked everything in Chestnut Roan ink and a sponge dauber. This project will be offered as a class this spring....look for the date soon! Hope you like it....try a frame project for your home, or for a gift. It is easy and FUN!! Lisa H.
Photobucket

Thursday, April 14, 2011

Bella Boulevard's Mr. Boy

Wow! I may be on a roll . . . I actually got the second layout done for "Operation Re-do George's Baby Book"! George was my parents first grandchild and he had an especially amazing bond with his grandfather. Instead of working chronologically, I did a themed layout about their relaltionship using Bella Boulevard's Mr. Boy line. (This layout stirred up a few tears since losing my Dad 10 years ago.) I don't know if I enjoyed working with combining the printed papers more or playing with their chipboard embellishments! Also used in this layout were circles cut from Spellbinders, New cotton Felt Fusion from Queen & Company (already adhesive-backed they applied like a dream!), Momenta's Puffy Stickers ("hugs"), and lots of embellies from Jillibean Soup's Blossom Soup's cardstock stickers. Also, loved getting yet another use from Jillibean's Corrugated alphies! Onto layout number three . . .
Photobucket

Wednesday, April 13, 2011

Design Team cards

Here are 2 cards I made today using April's Design Team papers by Pink Paislee and Cosmo Cricket. Great papers with fun patterns this month from both companies!

My ladybug card uses an older stamp by Great Impressions. I colored the ladybug with Copic markers, then added Enamel Accents by Ranger on the spots and Glossy Accents by Ranger on the head of the flower. I colored over the ladybug's eyes and mouth with a black Spica marker to give it a little shine, and used 2 sizes of Spellbinder's Deckled Rectangles on the card as well. A little ribbon and a tiny tag completes the card.


My star card is very simple and very quick to make. This would be a great birthday card for a child. I love the tiny stars on the paper and die cut the larger stars with a Sizzix die to use as my main image. No stamping on this card at all, but you could certainly add a sentiment to the inside. I wrapped some of the delicious Baker's Twine around the star and popped it up with foam tape.

 Don't forget to check out the Design Team projects in person when you come for Demo Day this Saturday!

Cindy

Good Times with Gina A.

I've heard from some scrappers in my 101 and journaling classes that they love our design team pages and samples in the store BUT they need/want to include more pics on their own layouts. So I set myself a goal with this month's pages to see just how many photos I could include on a two-page spread, and.... drum roll, please! .... believe it or not there are 19 pictures on my layout this month! You'll see that I was able to accomplish this by including many wallet-size photos, mixed with a couple 4 x 6's with some cropping as needed. Don't forget that you can mix and match photo sizes within one layout. Yes, wallet size may be too small for some of your photos but when you want to capture the "feel" of the event, smaller pictures of surroundings that set the stage for your theme (like the table setting, candle display, cake, etc. on my layout) may work just fine. And when you have a series of photos that show a sequence of events (my attempt at drinking an "Irish car bomb"!) I find that smaller photos stacked as I've done here help to show the "movement". I've used this same idea on at least four other layouts I can think of off the top of my head and I've always loved the results. Most importantly, in just two pages I've been able to capture the sights of the night AND include a place for journaling about our fun evening with friends! When including so many photos I like to keep the page fairly simple so another benefit is that I was able to stretch one piece of pattern paper pretty far. Embellishing with matching chipboard stickers and letters was all I really needed. Don't forget to "think outside the box". The title "good times" came with a second "o" in the word "good" using the same color scheme as the rest of the letters. But I wanted to introduce the red color to that part of the layout so I trimmed one of the chipboard flower stickers to create my own striped "o". A fun night and a fun layout to remember it! Happy scrappin' everyone! Gina A.
Photobucket

Homecoming!

Oh, I knew exactly which pictures I would use when I first saw these S.E.I papers--so elegant, so grown-up, so black-and-white! I loved the white tone on tone papers with this line and of course, the butterflies are the bomb. I chose to leave my butterflies plain white and layered some together for extra texture. I finished the centers with Hero Arts flat jewels--love how that turned out! The thick white satin ribbon on the far right is stapled every pleat to keep it in place then fastened with a ribbon slide. I normally use lots of colors in my layouts but this all black and white layout was fun to do.....it's so clean and streamlined. Come to the store and check out new lines of Jillibean (just about the cutest darn paper line out there!) and 3 new Cosmo Cricket lines that I just checked in today. Very retro, awesome colors! See you soon! Lisa H.
Photobucket

Monday, April 11, 2011

Makin a Splash with Cosmo Cricket

I have finally begun the daunting task of remaking my 18-year old son's baby album. I thought I was all-that-and-a-bag-of-chips back in the day because I was always current putting his baby pix in the baby book. Problem? It was a magnetic album! Now I realize to preserve the precious photos I need to re-do the book. What better line to start with than Cosmos Cricket's Hometown Summer?! The retro colors and flair inspired me for photos of George (then 8 months old) playing in the baby pool. (I am not sure what is more embarrassing for me. Being photographed in a bathing suit in the baby pool or my 1990's hairdo!!!!)

The first page of the layout was a direct result of scraplifting a layout I had seen at CHA by Cosmo's design team. I always love to cut designs out of printed paper and recreate them on a layout, as I did here with the splashes. The blue splashes were from the chipboard embellishment pack as were the fish and "SPLASH". Page two was my own creation. I was really pleased how the border turned out. I punched holes inside the life preservers then loosely threaded baker's twine (a must in any paper crafter's collection now!) through them. Adding some journaling, sea life embellies in three's, and lots of Glossy Accents and the layout was complete. Now for the next 1,000 baby pix . . .
Photobucket

Sunday, April 10, 2011

New All Occasion card class with Cindy


Join me on Saturday April 23 from 12 - 3 pm for a new All Occasion card class. In this class we will be making a total of 8 cards (2 of each of the 4 designs). We will be doing a little Copic coloring, some cutting and making cards that you can use for just about any occasion.

I look forward to seeing you then!

Cindy

Wednesday, April 6, 2011

Last Day of School!!

Well, we couldn't have been more surprised by this new line by Pink Paislee....it resembles Cosmo Cricket's retro vibe so much and we loved it!! Their new line called Hometown Summer definitely inspired me--I had pictures from the last day of school that would be perfect for these papers. I especially loved the border sticker pack--wowza do I love these or what?? I used 4 different ones on this layout and wanted to use 10 more if I just could have squeezed them in! As is usual with me, I tucked the journaling block back behind a photo with ribbons as the "pull tabs" on it. I use that technique a lot--it not only saves room, but also allows for more privacy of your words. Back to the Pink Paislee peeps, I already have plans for their watermelon border and papers for a summer layout; stay tuned! Hope you all are enjoying the bit of spring weather that is FINALLY come to Maryland. Hooray! Stop in to see us at the store soon! Lisa H, aka: Tall Lisa

Photobucket